At a Glance:
Choosing the right lip microblading shade starts with understanding your skin tone and undertone. Fair skin suits cool pinks and peachy nudes, while medium and olive tones glow with corals and warm reds. Darker skin looks vibrant in berries or brick tones—often after a neutralization session. A professional consultation, proper aftercare, and periodic touch-ups will help your lips stay beautifully defined with minimal daily effort.
Choosing the right lip microblading shade means finding a colour that enhances your natural features—not overpowers them. Your skin tone, undertone, and personal style all play a role in selecting a pigment that feels subtle, polished, and uniquely you.
In this guide, you’ll learn how to choose the most flattering lip microblading shade based on your skin tone and undertone. We’ll also walk you through what to expect during the procedure, how to care for your lips afterward, and what to keep in mind to get beautiful, long-lasting results.
Understanding Skin Tones
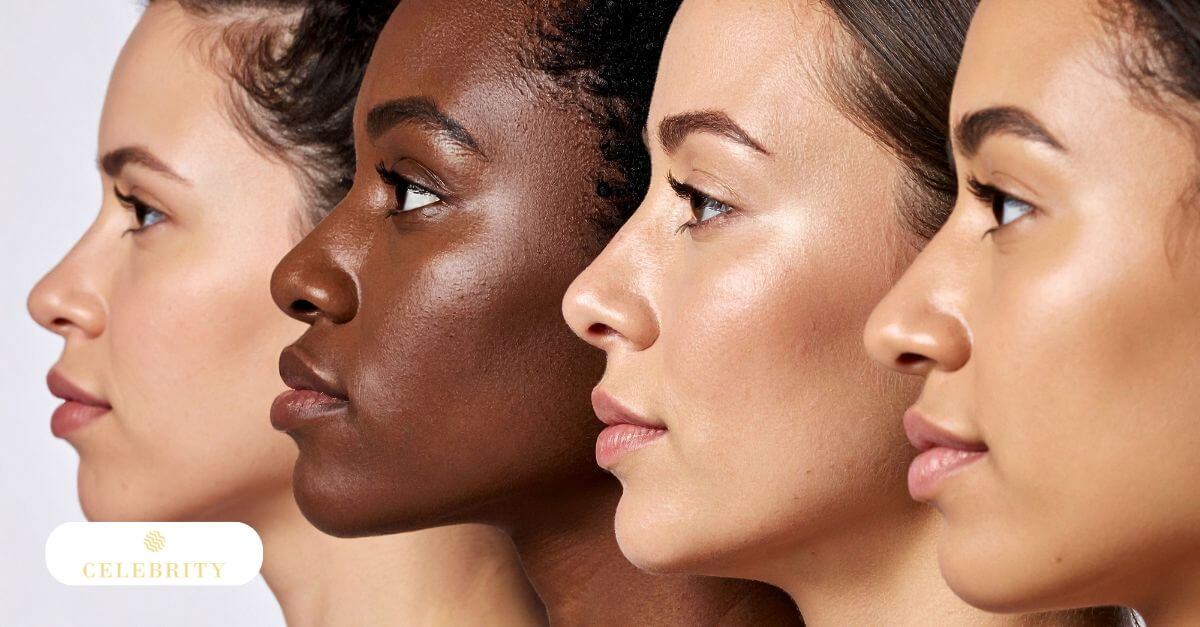
Knowing your skin tone is the first step in choosing a lip microblading shade that looks natural and enhances your features. Most complexions fall into four general categories: fair, medium, olive, and dark. Each reacts differently with pigment, so selecting the right shade depends on how your skin reflects colour.
Fair Skin
Often referred to as porcelain, this skin tone can look overpowered by bold pigments. Soft peach, nude, and cool pinks work best to enhance without overwhelming. If you’re seeking the best lip blush colour for fair skin, stick with subtle, sheer tones that blend naturally.
Medium Skin
Medium tones range from light tan to warm beige and typically carry more golden or peach undertones. Rose, mauve, and coral shades add gentle contrast and depth, making the lips appear fuller and naturally flushed.
Olive Skin
Olive complexions often have green or golden undertones. Rich corals, warm reds, and amber-based hues blend well with this skin tone. These colours amplify warmth without clashing or looking too intense.
Dark Skin
Darker complexions can support more saturated pigments. Shades like brick red, deep berry, and bright coral offer striking contrast and rich definition. If there’s natural lip darkness, a neutralization session may be recommended before the final shade is applied.
Identifying Undertones
Your skin’s undertone—cool, warm, or neutral—plays a key role in how lip pigments appear once healed. Matching your lip blush colour to your undertone creates a more balanced, natural finish that complements your complexion.
Cool Undertones
If the veins on your wrist appear blue or purple in natural light, you likely have cool undertones. Blue-based pinks and reds—like rose, raspberry, or wine—tend to heal true to colour and avoid clashing with cooler skin tones. These shades give the lips a soft, refined look.
Warm Undertones
Greenish veins usually signal warm undertones. Coral, peach, orange-red, and bronze hues pair well with this warmth, creating a cohesive, sun-kissed effect. These colours add vibrancy and enhance the skin’s golden or peachy glow.
Neutral Undertones
If your veins appear both blue and green, you may have a neutral undertone. This gives you the most flexibility in pigment choice. Muted pinks, warm mauves, and coral-nude blends all work well, shifting easily between subtle and bold depending on your personal style.
Popular Lip Microblading Shades
From soft nudes to rich berries, today’s lip microblading pigments offer options for every skin tone, undertone, and personal style. Here are the most popular shade categories—and how they show up once healed.
Nude
Nude tones mimic the natural lip colour, offering a soft, understated finish. Ideal for those who want a “no-makeup” look, nude shades blend seamlessly with the skin and work well across a wide range of complexions. They’re perfect for daily wear and subtle enhancement.
Pink
Pinks range from pale blush to deeper mauve tones. These shades create a fresh, youthful appearance and suit many skin tones. Cooler pinks enhance fair or cool-toned skin, while warmer pinks flatter medium to olive undertones.
Coral
Coral adds brightness and warmth to the lips. It’s especially flattering on medium to dark skin, where it brings a cheerful, sunlit glow. Coral blends red, orange, and peach elements, making it a lively choice for clients wanting a bit more energy in their look.
Berry
Berry pigments include deep purples, wine reds, and plum tones. These shades add drama and definition, often chosen by those who prefer bolder lip colours. Berry tones work particularly well on darker skin or cooler undertones.
Red
Classic red pigments—ranging from blue-based cherry to orange-based brick—offer bold, timeless colour. When chosen to suit your undertone, red shades can either brighten the face or add elegant depth. They’re ideal for clients looking for a statement lip with minimal daily effort.
Best Shade Picks for Your Skin Tone and Undertone
Once you understand your skin tone and undertone, you can confidently choose a lip blush shade that flatters your complexion and reflects your personal style. Here’s a guide to help you match shade categories to your natural colouring.
For Fair Skin
Fair or porcelain skin benefits from low-contrast shades that enhance without overpowering.
- Soft Peach Nude: Barely there, ideal for a natural look.
- Cool Pink: Echoes your natural lip tone while adding subtle brightness.
- Light Coral: Adds warmth without feeling heavy on pale skin.
For Medium Skin
Medium tones are versatile and look especially radiant with balanced colour depth.
- Rose: A soft yet noticeable shade that works well for everyday wear.
- Orange-Based Coral: Enhances the golden undertones in medium skin.
- Mauve: A muted pink-purple that suits both warm and cool undertones.
For Olive Skin
Olive complexions pair beautifully with warm, vibrant pigments.
- Warm Amber: A natural brown-orange that blends into golden undertones.
- Sunset Red: An orange-leaning red that complements olive warmth.
- Coral: Adds lift and brightness without overwhelming your base tone.
For Dark Skin
Deeper skin tones hold rich pigments well and benefit from bold, saturated shades.
- Bright Coral: Stands out against melanin-rich lips while staying vibrant.
- Brick Red: A warm, earthy red that adds structure and depth.
- Berry: Deep plum and wine tones offer richness and dimension.
Tip: If you have darker lips with uneven pigment, a neutralization session may be needed before applying the final colour.

Consultation and Customization
A professional consultation is essential to choosing a lip microblading shade that aligns with your skin tone, undertone, and lifestyle. During this session, your artist will assess your natural lip colour, shape, and symmetry. They may also use a lip tattoo colour chart to guide the selection process and custom-blend pigments for a better match.
If your lips are naturally dark or uneven in tone, your artist may recommend a neutralization session. This involves applying a corrective base pigment to balance the lip colour before adding your chosen shade. This step helps ensure the final result appears even and vibrant.
A patch test is typically performed in advance to check for any sensitivity to pigments or numbing agents. This precaution helps reduce the risk of allergic reactions and ensures you’re a good candidate for the treatment.
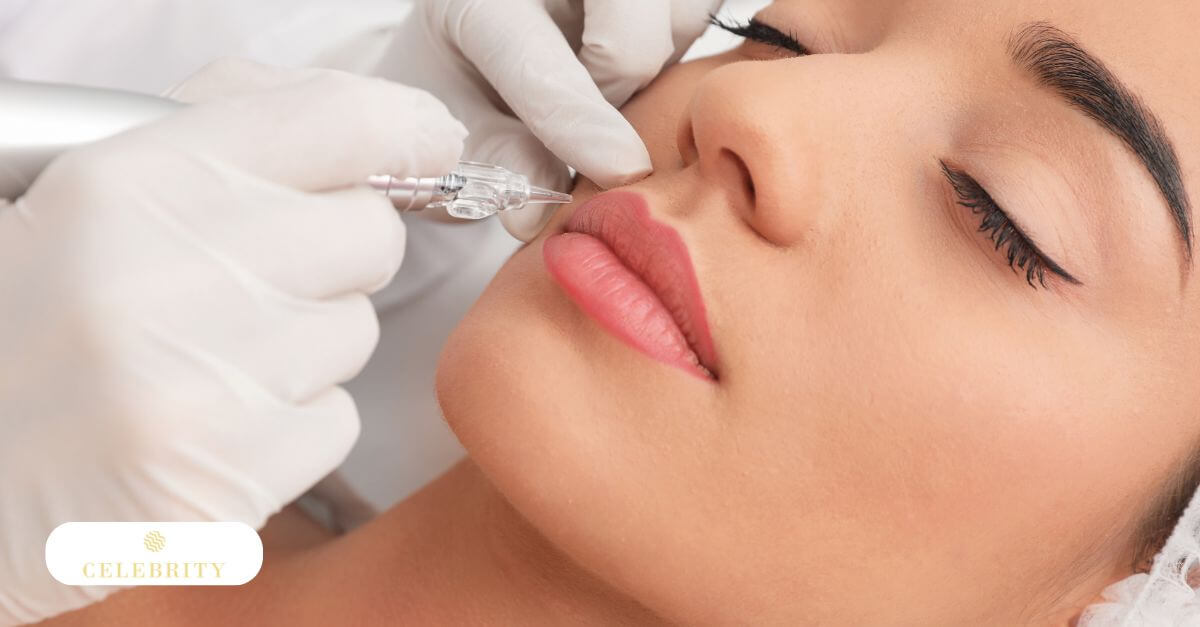
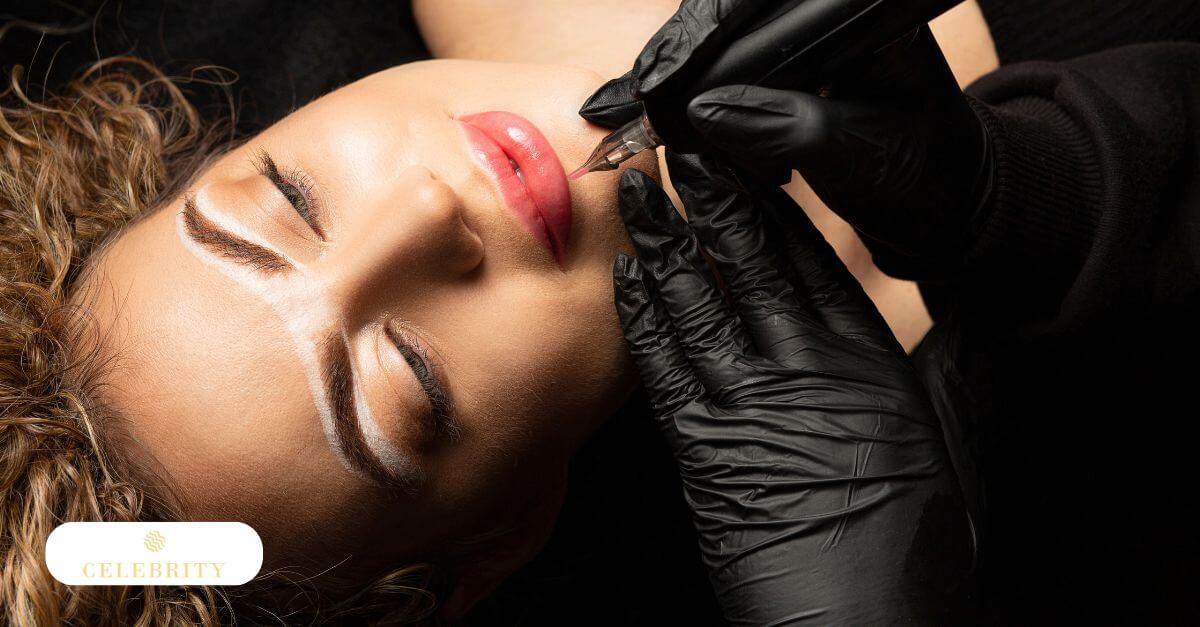
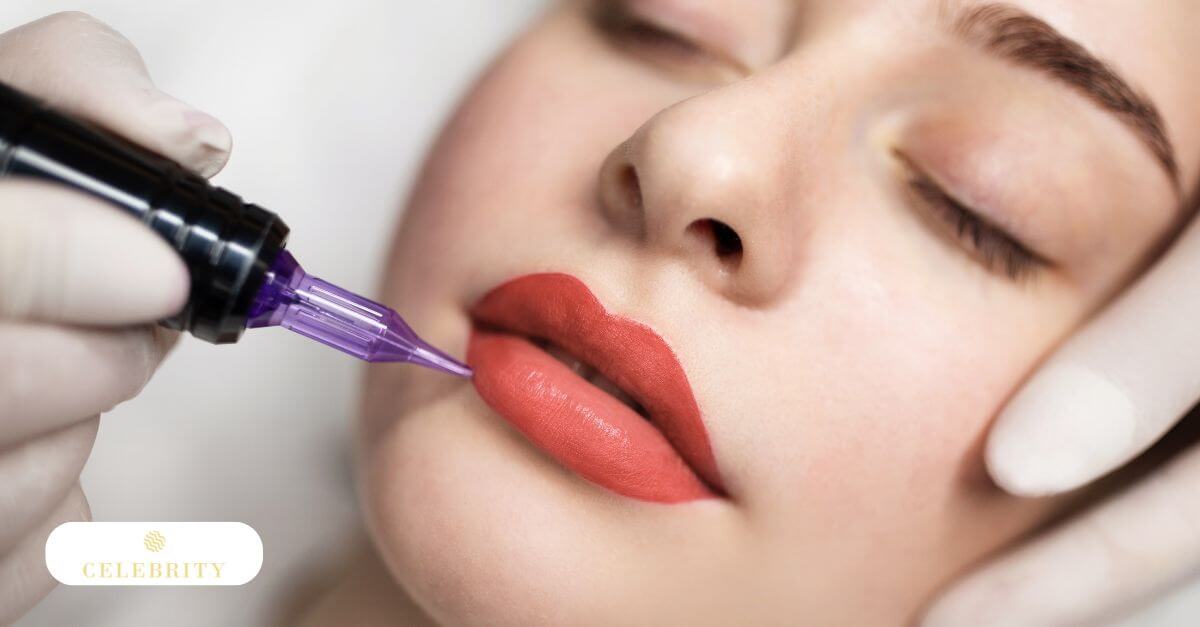
Procedure Insights
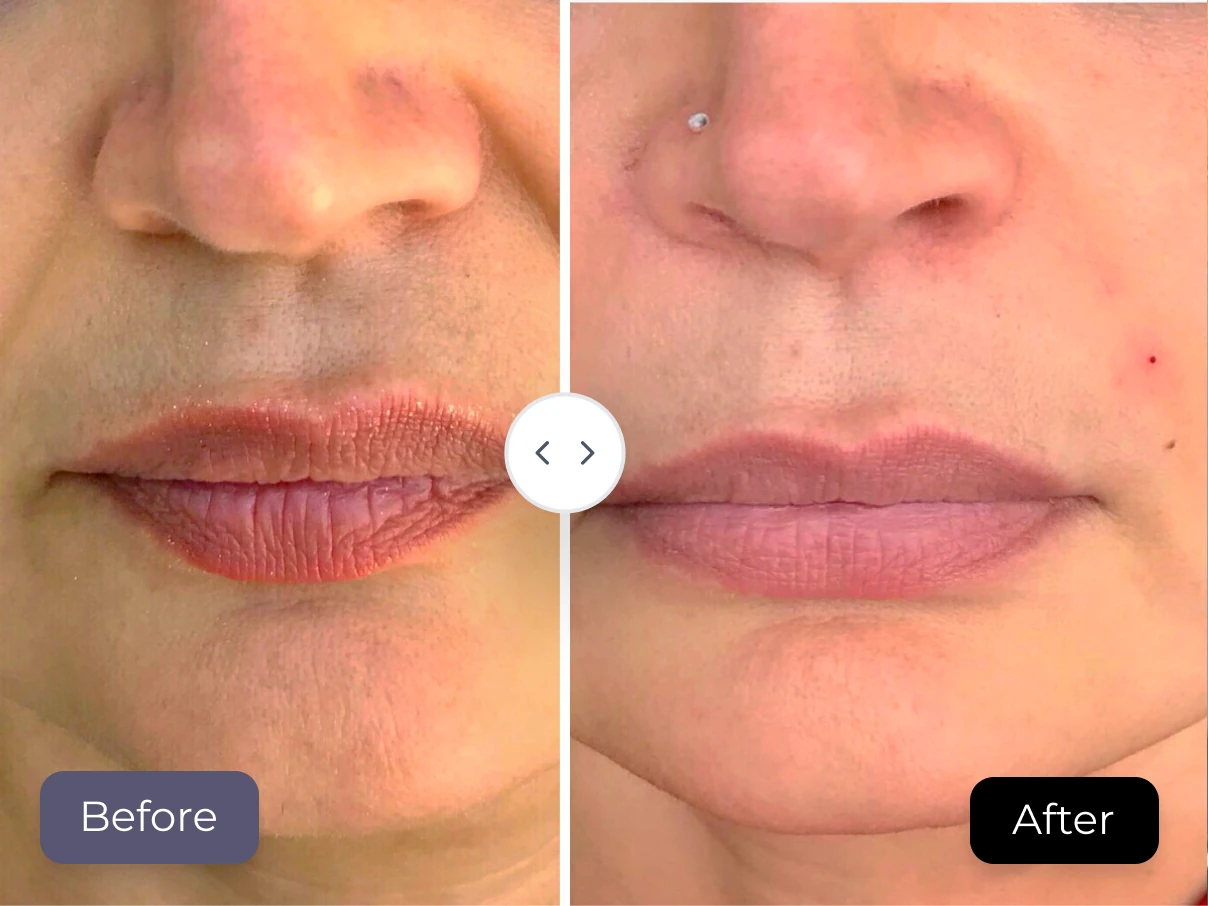
Lip microblading, also known as lip blush tattooing, is a detailed cosmetic procedure that enhances lip colour, shape, and definition. Here’s what to expect at each stage of your appointment.
Preparation
The artist begins by applying a topical numbing cream to reduce discomfort. Your lips are then cleansed to remove any oil or bacteria, and the desired shape is mapped out for symmetry. This outline is based on your natural lip line and the shade discussed during your consultation.
Pigment Application
Using a handheld device with fine needles, the artist deposits pigment in light, even layers across the lips. This technique builds colour gradually, allowing for soft, natural-looking results. Thanks to numbing, most clients report only minor pressure or a mild tingling sensation.
Duration
The full procedure typically takes 90 to 120 minutes, including consultation, numbing, mapping, and application. The timeline may vary slightly depending on your lip shape and the complexity of the desired outcome.
Touch-Up Session
A follow-up appointment 6 to 8 weeks later helps refine pigment retention and colour balance. It’s also a chance to adjust the shade if needed. This step ensures a polished finish and longer-lasting results tailored to your skin’s healing process.
Aftercare and Maintenance
Proper aftercare is key to achieving vibrant, long-lasting results after lip microblading. Following your artist’s instructions will help prevent complications and support smooth healing.
Keep Lips Clean
In the first 24 hours after pigmentation, gently blot your lips with a clean, sterile cloth to remove lymph fluid. This reduces the risk of crusting or infection. Use lukewarm water and pat dry—never rub or scrub.
Moisturize Regularly
Apply a fragrance-free, hypoallergenic healing balm daily to keep lips hydrated. This prevents cracking and encourages even colour retention. Avoid petroleum-based products unless specifically recommended by your technician.
Avoid Irritants
For the first week, avoid spicy or salty foods, direct sun exposure, swimming, and excessive sweating. These factors can interfere with pigment bonding and increase irritation. Use a straw when drinking and wear a wide-brimmed hat if going outdoors.
Long-Term Maintenance
Plan for a yearly touch-up to refresh colour depth and maintain even tone. Some clients may need touch-ups sooner depending on their skin type, sun exposure, or lifestyle. Your artist can provide a personalized schedule based on your healing and pigment fade rate.
Risks and Considerations
Lip microblading is generally safe when performed by a trained professional, but like any cosmetic procedure, it comes with potential risks. Knowing what to expect—and how to minimize issues—helps ensure a smooth experience and beautiful results.
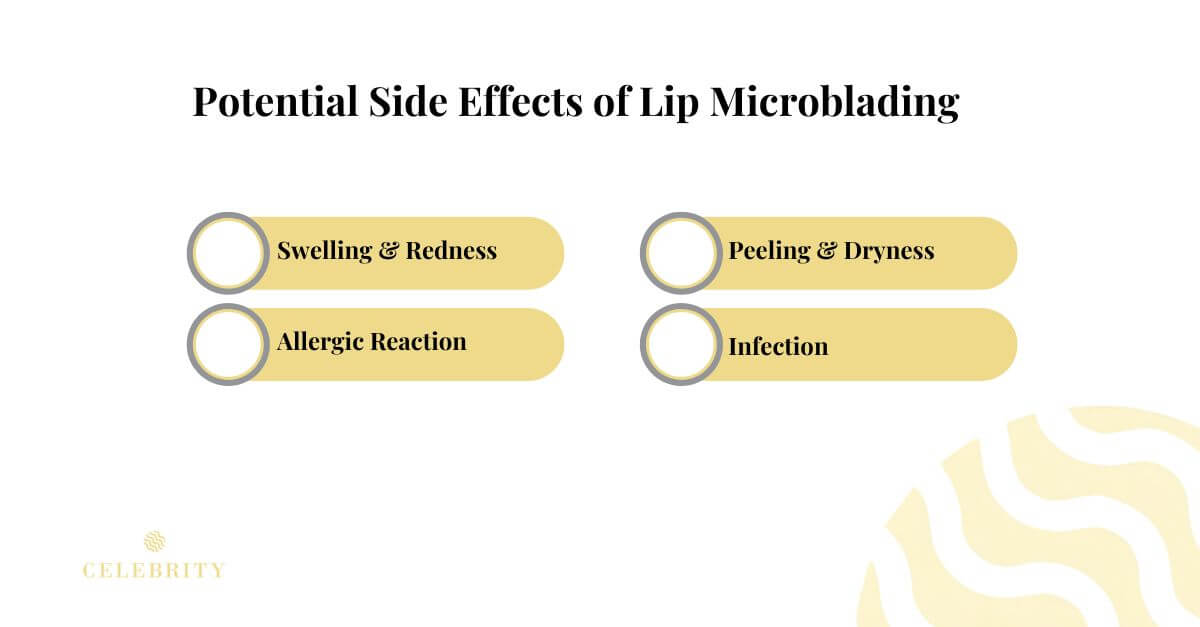
Swelling & Redness
Mild swelling and redness are common immediately after treatment. This is a natural response and usually fades within a couple of days. Applying a cold compress and following aftercare instructions can help reduce discomfort.
Peeling & Dryness
As the lips heal, light peeling or flaking may occur. It’s important not to pick at the skin, as this can lead to uneven pigment or scarring. Keep lips moisturized with the recommended balm to support healing.
Allergic Reaction
Although rare, allergic reactions to pigments or numbing agents can happen. To reduce this risk, a patch test should be done before the procedure to check for sensitivities.
Infection
Infection is typically caused by poor hygiene or incorrect aftercare. Always choose a certified technician who uses sterile tools, and follow all post-procedure care instructions carefully to keep the area clean and protected.
Final Recommendations
Choosing the right lip microblading shade starts with understanding your skin tone and undertone. From soft nudes and peachy pinks to rich berries and bold reds, there’s a pigment to suit every complexion and style.
Fair skin tends to look best with cool pinks or peach-based nudes. Medium and olive tones often glow with corals, rose, or amber hues. For dark skin, saturated shades like berry or brick red offer stunning contrast—especially when paired with a colour-neutralizing session, if needed.
A detailed consultation allows your artist to assess your natural lip tone, blend custom pigments, and address concerns like uneven colour or fading. Knowing what to expect from the procedure and following proper aftercare will help your lips heal beautifully and stay vibrant for months to come.
For long-lasting results and expert guidance, book your appointment with Celebrity Laser—where personalized care and professional artistry come together to enhance your natural beauty.